This dialog is used to modify properties of a shape.
You can call this dialog from the Format / Shape Properties menu, from the context menu or by using the keyboard:
The dialog contains the following tabs:
Line - describes the line attributes
of a shape, such as line color, pattern, weight, type and size of line ends,
corner rounding.
Fill - describes the fill and shadow attributes of shapes.
Behavior & Protection - determines how the shape interacts with other
shapes, allows to protect some parameters from changing.
Information - contains basic information about the selected shape.
Double-Click - allows to assign an action that is performed when
the shape is double-clicked.
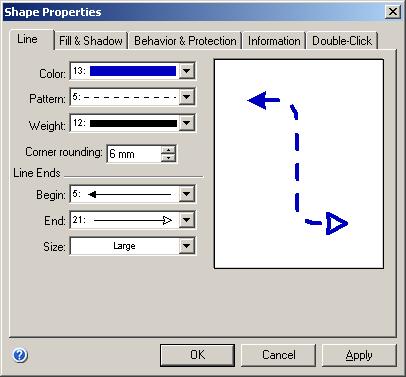
The Line tab in Windows:
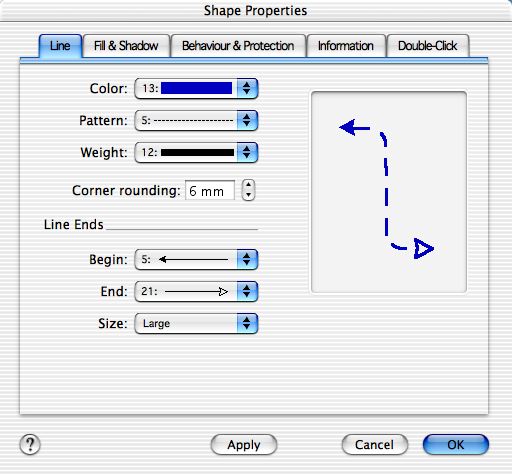
The Line tab in Mac OS X:
If there are no shapes selected, the tab displays the settings that will be applied to new shapes. If there are shapes selected, it will display the attributes of the selected shapes. In the right section of the tab you can preview how the line will look with the specified settings.
Color - allows to choose a line color from the list. The color scheme is indicated to the left from the color - the index in the color palette, RGB or CMYK. You can choose the main 32 colors from the list; for more colors choose Custom at the bottom of the list. The Color dialog will come up where you can select the needed color.
Pattern - sets the line pattern (solid or dotted). The index may be in the 0 - 15 range. The 0 value means the line is not displayed (No Line).
Weight - sets the line weight. There are 10 pre-defined values in the list: No Line, 0, 1, 4, 8, 12, 16, 20, 24, 28. The line weight is specified in units. The last item in the list, Custom, is used to call the Custom Line Weight dialog, where you can set any other line weight. The 0 value means that the line will always look as if it had the 1 weight, regardless of the zoom level.
Corner Rounding - sets the radius used for corner rounding.
The Line Ends specifies the parameters of the line ends.
Begin - allows to choose an arrowhead for the beginning of the line. You can choose an arrowhead within the 1 - 60 range. The No Arrows item denotes no arrowhead.
End - allows to choose an arrowhead for the end of the line. You can choose an arrowhead within the 1 - 60 range. The No Arrows item denotes no arrowhead.
Size - sets the arrowhead size. The following sizes are offered: Tiny, Small, Medium, Large, Huge.
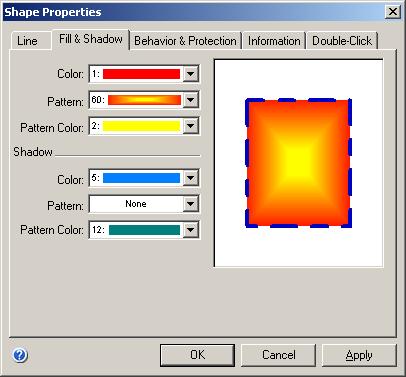
The Fill tab in Windows:
The Fill tab in Mac OS X:

If there are no shapes selected, the tab displays the settings that will be applied to new shapes. If there are shapes selected, it will display the attributes of the selected shapes. In the right section of the tab you can preview how the shape will look with the specified settings.
The Fill section contains the fill attributes of the shape.
Color - sets the fill color. The color scheme is indicated to the left from the color - the index in the color palette, RGB or CMYK. You can choose the main 32 colors from the list; for more colors choose Custom at the bottom of the list. The Color dialog will come up where you can select the needed color.
Pattern - sets the fill pattern. The index may be in the 0 to 38 and 50 to 69 range. The 0 value means the shape is not filled, the 1 value indicates a plain fill, values from 2 to 38 denote various fill patterns, 50 - 69 are for gradient fills.
Pattern Color - sets the pattern color (the color of pattern elements, or background color for a gradient fill). The color scheme is indicated to the left from the color - the index in the color palette, RGB or CMYK. You can choose the main 32 colors from the list; for more colors choose Custom at the bottom of the list. The Color dialog will come up where you can select the needed color.
The Shadow section is used to set the shadow fill and pattern. It contains the same fields as the Fill section.
The Behavior & Protection tab in Windows:

The Behavior & Protection tab in Mac OS X:

The Interaction Style section determines whether the shape is a connector or not, and lets you turn any shape into a connector if necessary:
Line(1-D) - the shape behaves as a line - it has a begin and end point
(is a 1D-shape). Such shape can be used as a connector.
Box(2-D) - the shape behaves as a 2D-shape, that is, it has
width and height.
The Selection Highlighting section describes how the shape is displayed when selected. The following options are available:
Show shape handles - display or hide the handles on the shape's alignment
box. This option is on by default.
Show control handles - display or hide the control
handles of the shape. This option is on by default.
Show alignment box - display or hide the shape's alignment box. This
option is on by default.
The Resize Behavior section describes how the shape behaves within a group when the group is resized:
Scale with group - always resize the shape as the group is resized.
This option is set by default.
Reposition only - simply move the shape without changing its size.
Use group's settings - the shape uses the behavior settings of the
group to which it belongs.
Save original scale - if this option is on, the shape will keep its size when inserted into a document with some other scale. Otherwise, the size of the shape will be changed according to the scale settings of that document.
The Group Behavior section describes how the group behaves.
Enable group's text - allows the group to have its own text.
Select group only - sets whether you can select shapes inside the group.
The Protection section allows to protect some properties of the shape from changing.
Width - locks/unlocks the shape's width against resizing.
Height - locks/unlocks the shape's height against resizing.
Aspect ratio - if on, the ratio between the width and height is always
preserved when the shape is resized.
Begin point - for 1D shapes, locks/unlocks the begin point against
repositioning.
End point - for 1D shapes, locks/unlocks the end point against repositioning.
X position - locks/unlocks the horizontal (X) position of the shape.
Y position - locks/unlocks the vertical (Y) position of the shape.
Rotation - locks/unlocks the shape against rotation.
Deletion - locks/unlocks the shape or its vertices against deleting.
Show text - sets whether to display the shape's text.
Don't print -sets whether the shape can be printed.
The Information tab in Windows:

The Information tab in Mac OS X:

When more than one shapes are selected, displays information for the primary selected shape.
ID - indicates the unique number of the shape in
the current document.
Sub ID - indicates the number of the shape in its
parent group. It's used for referring to shapes inside a group.
Name - in this field you can type the name you want to assign to the
shape.
Layer - assigns the shape to a layer.
Note: Unlike other fields on this tab, the layer field affects all selected shapes, not the primary shape only.
Type indicates the type of the shape. The following types exist:
shape,
group,
connector,
smart connector,
raster picture,
vector picture mf,
verctor picture pict,
vector picture vf,
OLE paint.
Width - displays the width of the shape.
Height - displays the height of the shape.
Angle - displays the angle of the shape.
Description - in this field you can provide a description of the shape.
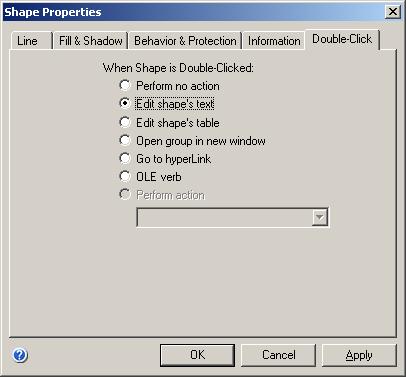
The Double-Click tab in Windows:
The Double-Click tab in Mac OS X:
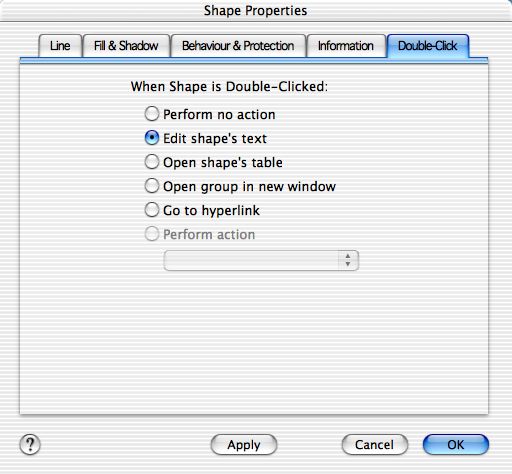
This tab specifies the action, performed when the shape is double-clicked:
Perform no action - nothing happens.
Edit shape's text - turn on the text editing mode.
Edit shape's table - display the shape parameter table.
Open group in new window - open the Edit Group window, where you can
edit the shapes inside the group (this option is only available for groups).
Go to hyperlink - open the hyperlink (available if the shape has a
hyperlink).
OLE Verb - perform the OLE action (available only for the OLE paint
type shapes).
Custom action - perform a user-defined action.
Two modes are available: you can choose an action from the list, or choose the
Action Loop option - in this case each time the shape is double-clicked
the next action from the list is performed.